Preparing for Virtual Visits
How to Prepare for Your Online Appointment
Follow these instructions to prepare for your video visit.
Preparing For Your Video Visit
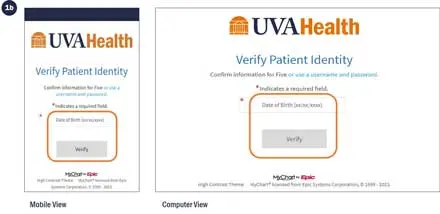
You don't need a MyChart account to have a virtual visit by video. You'll get a video link by text and email the morning of your appointment. You won't need to log in or use a password. But, you will be asked to enter your date of birth to verify your identity.
For your video visit you'll need:
- To be in Virginia at the time of your appointment (unless preapproved by your provider)
- A quiet, private space
- Your smartphone, tablet, or computer with a working camera and microphone
- Available internet service
- One of these web browsers: Google Chrome or Apple Safari
Connecting To Your Virtual Visit by Video
You don't need a MyChart account to have a video visit with your UVA Health provider. In this video, we walk you through the process of connecting to your video visit on your phone.
On the Day of Your Video Visit
Make sure your smartphone, tablet, or laptop is fully charged and that the camera and microphone work.
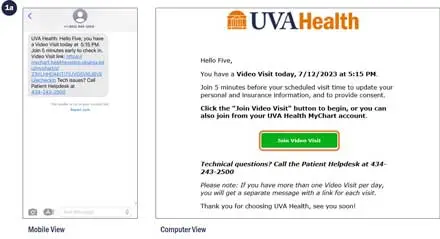
Around 7 a.m. the morning of your scheduled video visit, patients 13 years of age and older will get both an email and a text with a link. The email comes from [email protected], and the text message comes from an (855) number.
Please connect through the link 5 minutes before your appointment time to answer some questions and check in.
If you have a UVA Health MyChart account, you can still have your virtual visit through the MyChart app or webpage. The automatic links are another option to enter the visit.
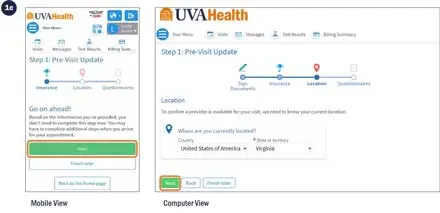
Step 1: Complete the Pre-Visit Update
a. Connect through the link
b. Enter your Date of Birth and begin the Pre-Visit Update
c. Answer the questions about your personal information, insurance, and location and give consent for the video visit
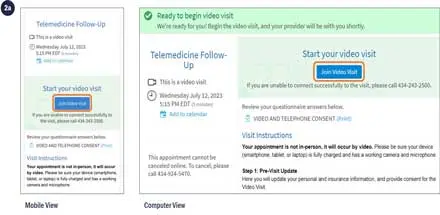
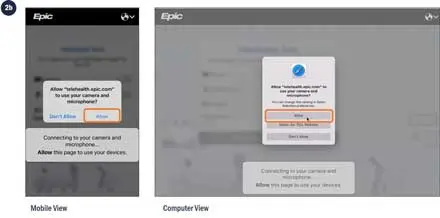
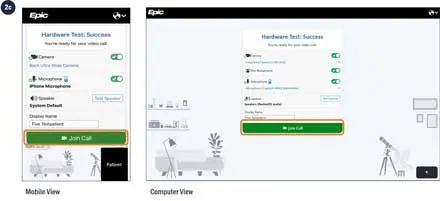
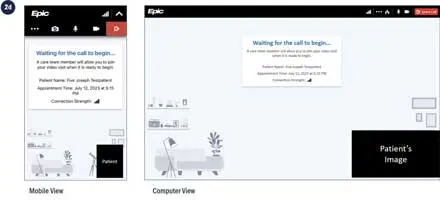
Step 2: Join Your Video Visit
a. At the time of your appointment, click Join Video Visit to launch a new window
b. Click Continue to allow access to your camera and microphone (required for visit)
c. After the camera and microphone connect, click Join Call when you're ready
d. You'll stay in the Waiting Room until the provider admits you into the visit
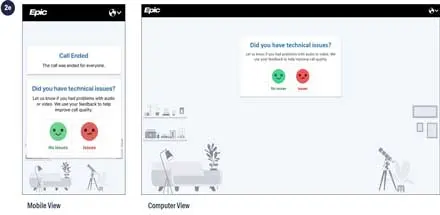
e. At the end of your visit, answer the survey question